
Do you like traveling to the famous places of the world and do you want to bring back remarkable pictures from there? The following tips will help you to get fine results, including the planning stage at home, the work on location, some technical aspects and tips to the post-processing.
Iconic Places
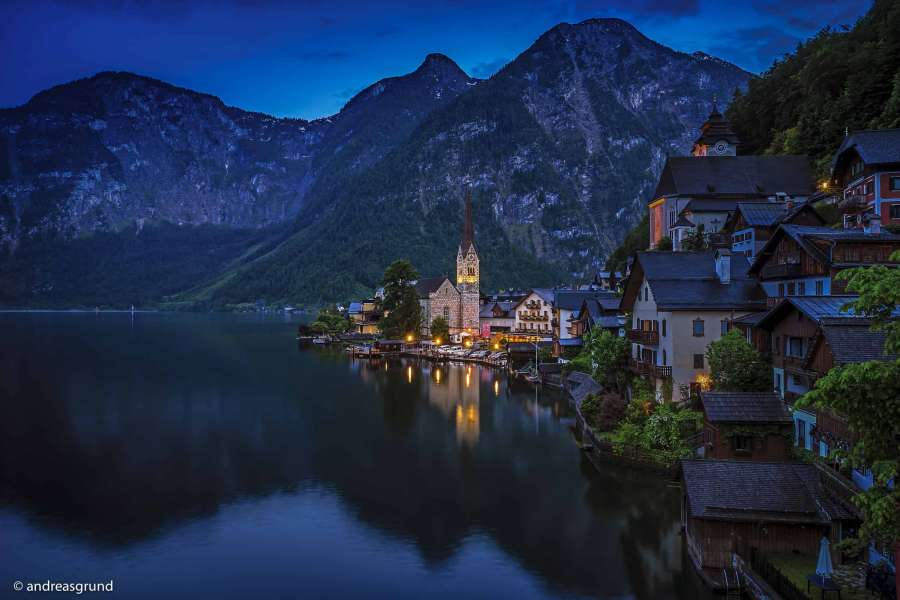
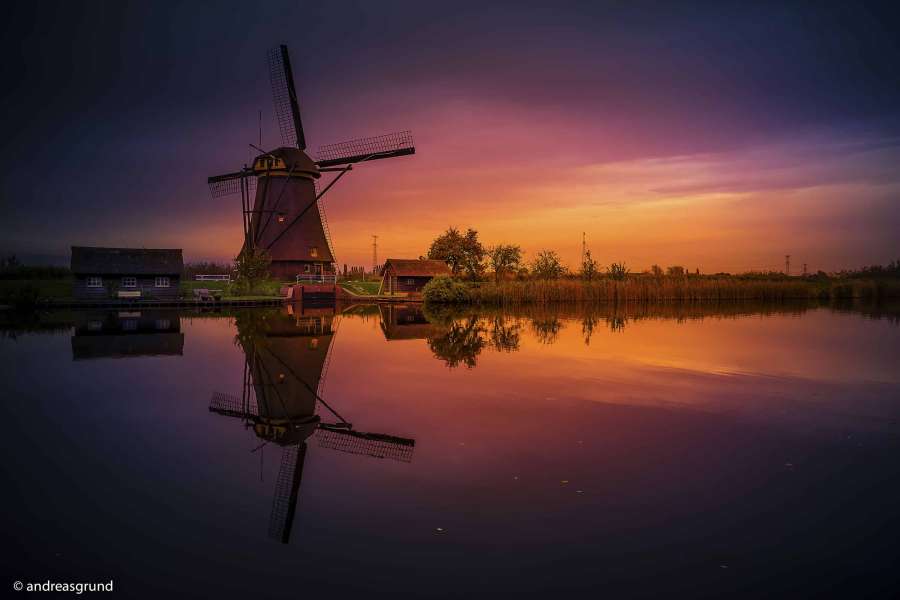
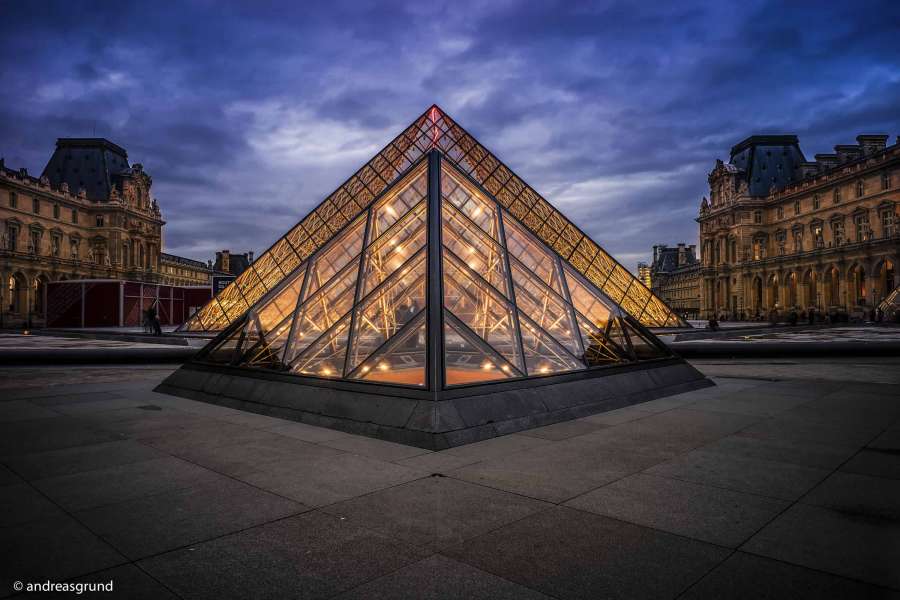
I’m truly fascinated by iconic places with their very special atmosphere and their uniqueness. These can be cities like Paris, New York, Amsterdam or typical UNESCO Heritage sites like the windmills of Kinderdijk or Hallstatt in Austria presented below. But do you know the first feeling of disappointment when you arrive there? I personally know it very well, usually there are many tourists running around disturbing your planned masterpiece, the weather and light are not as expected, you are searching for orientation and you have absolutely no idea where and how you could take a remarkable picture here. The following tips may help you get better results, but of course you have to find your own way of doing things.
The Planning Stage at Home
First, still at home, I’m looking for great images on websites like 500px, flickr or Google. There are many excellent photographers with inspiring pictures and especially on 500px, it is easy to find really good ones, since it is possible to do a keyword search and then sort the pictures by their pulse-rating. So, before I actually get to a place I already have an idea of what awaits me ideally. To have some possible images in my mind is one essential part of my whole photography process. But please take note, the actual conditions might be very different depending on the season, the weather, the light, the time etc. Have some basic ideas in your mind but be flexible, that´s the key.
On Location
Photography means drawing with light. In cities, be patient and wait for the perfect light in the Blue or Golden Hour time. Why is that important? In my experience, one of the best times to take photos is exact at that moment when the street lights have just been switched on. In this Blue hour you usually have 15 to 30 minutes to get your photo before the contrasts increase and the colors disappear more and more. Due to the limited time frame, you have to find your position in advance. Don´t run around hectically but concentrate on only a very few spots which are located nearby. Take your time there and stay focused!
If you take pictures of landscapes, basically follow the same rule: be there very early in the morning or late in the evening around sunset when the light is smooth. I’m usually very happy if there are clouds in the sky. The pictures look much more dramatic and so don´t worry if the weather seems to be not so good, you have a powerful tool afterwards called “post processing”. And you can trust the capability of your sensor which collects much more details than visible for your eyes. So take your photos even if it is raining because sometimes you will be surprised by the final results.
Some Technical Aspects
There is no doubt, it´s hard to get a good shot without the ability to operate your camera blindly, even in the manual mode. Most of the people I know work with blending techniques to get control over the highly? Dynamic range in twilight situations and they usually achieve good results. I personally don´t like the unrealistic HDR style and I also love the challenge to take the photo with exact one shot. Call me a purist but all my pictures are single exposures and I never use any filter.
One essential thing is, if you are working in that way, to avoid the blowout of the highlights coming mostly from light sources; usually it is not possible to recover them in post processing. For these reasons I underexpose my images with -1.0 to 1.5 EV and reconstruct the dark shadows later in Lightroom or Photoshop. This technique works only if your camera sensor has an internal high dynamic range with low noise behavior. For a maximum of image quality, I use only High End prime lenses on my Full frame camera. To achieve sharpness from edge to edge I usually use an aperture of f/8 or f/11.
Additionally, a very important aspect is the following: always have the principal rules of image composition in your mind or try to learn them. It helps a lot if you are able to concentrate on your actual object respecting the light conditions – and the other things during your photo shoot are running automatically in the background. And the very last advice: find your own style to take pictures, which is easily said – but understand this aspect as part of your learning curve.
Post Processing
Back in the “analogue times”, you usually took the pictures and left the processing up to the lab of your trust. Only a few people did their photo development by themselves, maybe some B&W photographers. When I was very young, I learned the chemical processing technique step by step in school and what I have learned there is that processing takes its times and it can largely influence the final result.
The situation in our digital times is not that different from the analogue times. High quality post-processing is extremely important and you have to spend many hours to learn it. I usually develop my raw files and do the first basic adjustments in Lightroom. The next step is the fine editing in Photoshop. It would be too much to explain every step here, but I would like to state that each of my pictures is individually carefully post processed and I do not follow a routine.
There are a lot of video tutorials on the Internet, starting with basic workflows or dealing with advanced techniques like working with luminosity mask. It´s up to you, but it takes a lot of time to learn such complex programs. And be aware: not everything that is possible makes the photo better! As I just said, try to find your own style and don´t forget: sometimes less is more.
I wish all of you great success and good light!
Tips by Andreas Grund
Andreas Grund, a Math and Physics teacher by profession, and is a photographer publishing his works successful on 500px. Andreas is specialized mainly in Blue Hour photography, often with real water reflections using a single exposure technique. The brilliance of his photos is a result of his feeling to wait for the magic light and his technical skills also in post-processing respecting the general rules of image composition.
If you want, you can follow him on:
500px.com/dragrund