
Shooting a still life may sound simple, but there are a few things to keep in mind when venturing into Still Life Photography. Basically you need a camera, something to photograph, and good light. This article is based on my own personal opinion and what works for me. Most of the time I shoot with a 24-70 lens which gives good flexibility when aiming at your focal. It lets you decide how much surrounding detail to include in your final image. A sturdy tripod can be of help if you have any hand shake at whatever speed you choose to shoot. Keeping your ISO fairly low will help eliminate noise or grainy-ness in your final image. I can share a few simple tips to help get you started.
Good Lighting
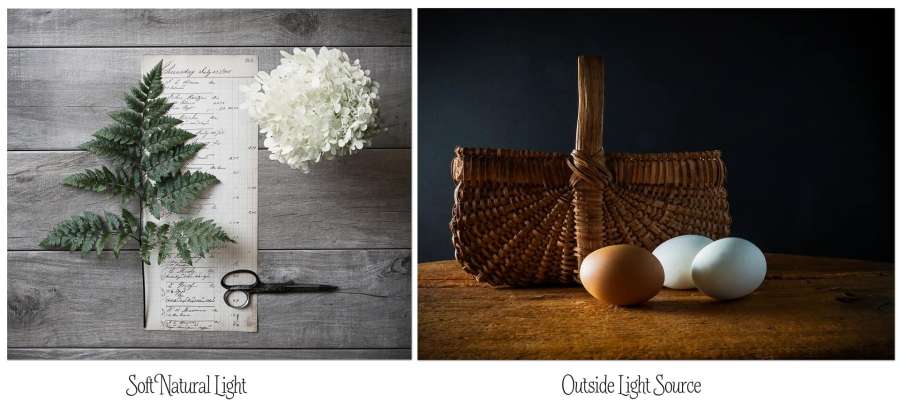
I like to use natural light, but will also use a good diffused light source when needed. Having a large window to work near will give you great natural light. If your separate light source is too harsh it can been diffused with a velum type paper or by draping sheer white fabric over the source. Just make sure that the material you diffuse your light with is not touching the bulb. Setting your camera to Auto White Balance is a good place to start if you have good light. My examples here show you natural light vs. another light source. Both can be used to advantage.
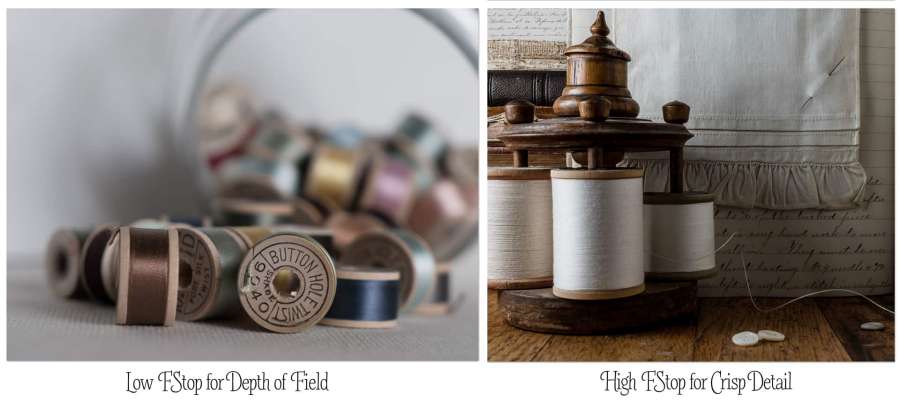
Lower FStop vs. a Higher FStop
A lower FStop setting in your camera will give you some background blur which can be very appealing if your focal point is more forward in the image. A higher FStop setting will help keep all of the details sharp and crisp in your image. Experiment with both, because they can give great results depending on where you wish to draw the eye in your image and depending on how much detail you would like to share.
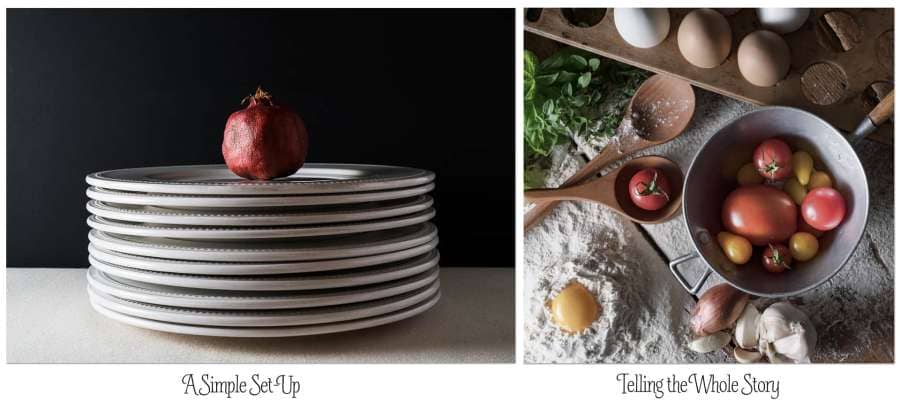
Telling the Story
Shoot with intention. Shoot with the intention of telling the story that you wish your viewer to know. It can be a simple set up with a single item to showcase simplicity or it can have numerous items in the image to tell more of the story. Showcasing a single item can make a stellar image, but telling an entire story certainly draws the viewer into the scene.
Shooting Angles
Shoot your image from different angles to help set the scene. Often times still life photography is shot straight on which gives the viewer information from a straight perspective. Try shooting from the top down to show another perspective which might have a bit more interest for the viewer. Different angles can be used to showcase your work. You can set the scene!

Filling the Frame
Sometimes it is best to just fill the entire frame with the focal point. It brings the viewer right there! It eliminates any distraction and there is no question what your image is about. Here I’ve given you an example of Shine and Shadow alongside some very Bold Color. Both images leave no doubt what you wish the viewer to know.

Tips by Karen Burns
I am a stickler for detail in the ‘set up’ stage. There is nothing worse than beginning to process your images only to find that something is ‘off’. So take several test shots. I find that a few test shots with the iPhone to study the composition helps me set the scene before beginning with the big camera. What you shoot will depend on the story you wish to tell with your imagery. Find a spot to shoot, get your camera ready, and set up a still life that interests you. And have fun exploring the many different ways to present your subject.